BCozy
This documentation provides a guide on how to interact with the graphical user interface. The different menus and interaction interfaces are described.
Start of the Program
On the start-up of BCozy the connections to your smarthome is initialized. During this progress, an overlay is shown, that tells in which state of the start-up routine the program currently is. After successfully initializing BCozy the GUI with its elements should be visible and if available a room plan might be loaded into the view.
Description of GUI Elements
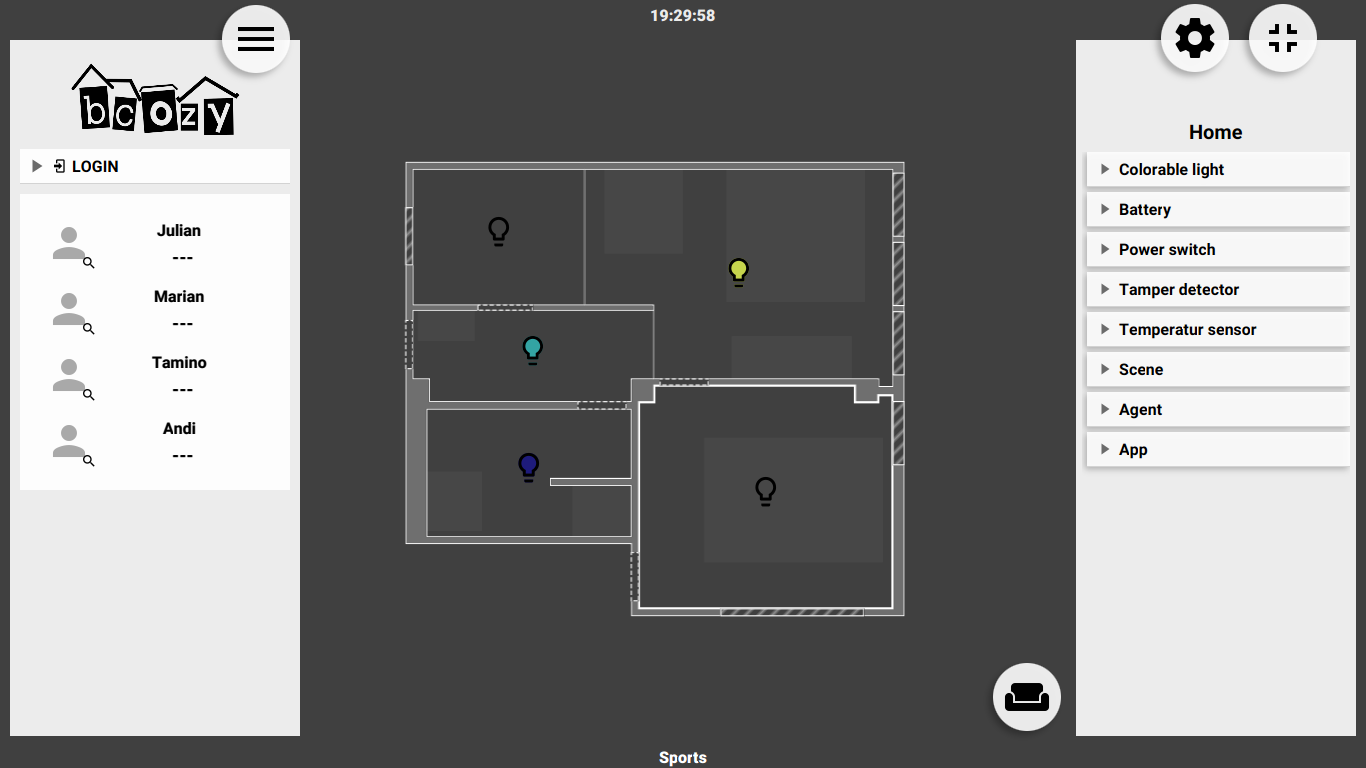
The GUI is separated into three main parts. Additionally, there are small bars on top and on the bottom of the interface. The upper bar is designed to show the current time to the user and the lower bar to show some extra information related to the current mouse or touch reference explained in the info bar chapter. The main part of the GUI is the room plan that is located in the middle of the screen. Actually it is covering the whole interface, so it seems like the two menus on the left and on the right side are floating on top of it. The two menus are the main menu on the left side and the unit menu on the right side. The GUI is designed to be controlled by a mouse or by a simple touchscreen interface. Therefore most of the actions are click based and do not require a keyboard.
Location Navigation
The biggest part of the GUI is the room plan. Once it is loaded, the current plan is shown as a 2D map of the environment. Different aspects of the plan are visualized in different shapes and grey shades. Solid walls consist of a bright white border and are painted in a bright grey. Windows that are placed within walls are slightly cross-striped with different grey tones. Doors that can be opened have the same background color as a room and have hatched outlines. Areas within a room are highlighted with a slightly brighter grey.
Location Plan Layers
BCozy provides four different view modes for different purposes. To switch between these views there is a select button in the bottom right corner of the location view which pops up the different options when it is clicked.
The person symbol is connected to the default view. It is described below (see Room plan interaction). The thermometer opens the maintenance layer. It gives an overview over all maintenance-related units, namely batteries, tamper detectors, temperature sensors and smoke detectors. The units are displayed if they have a defined position. The display is not dependent on the selected room, all units are visible, whether their room is selected or not.
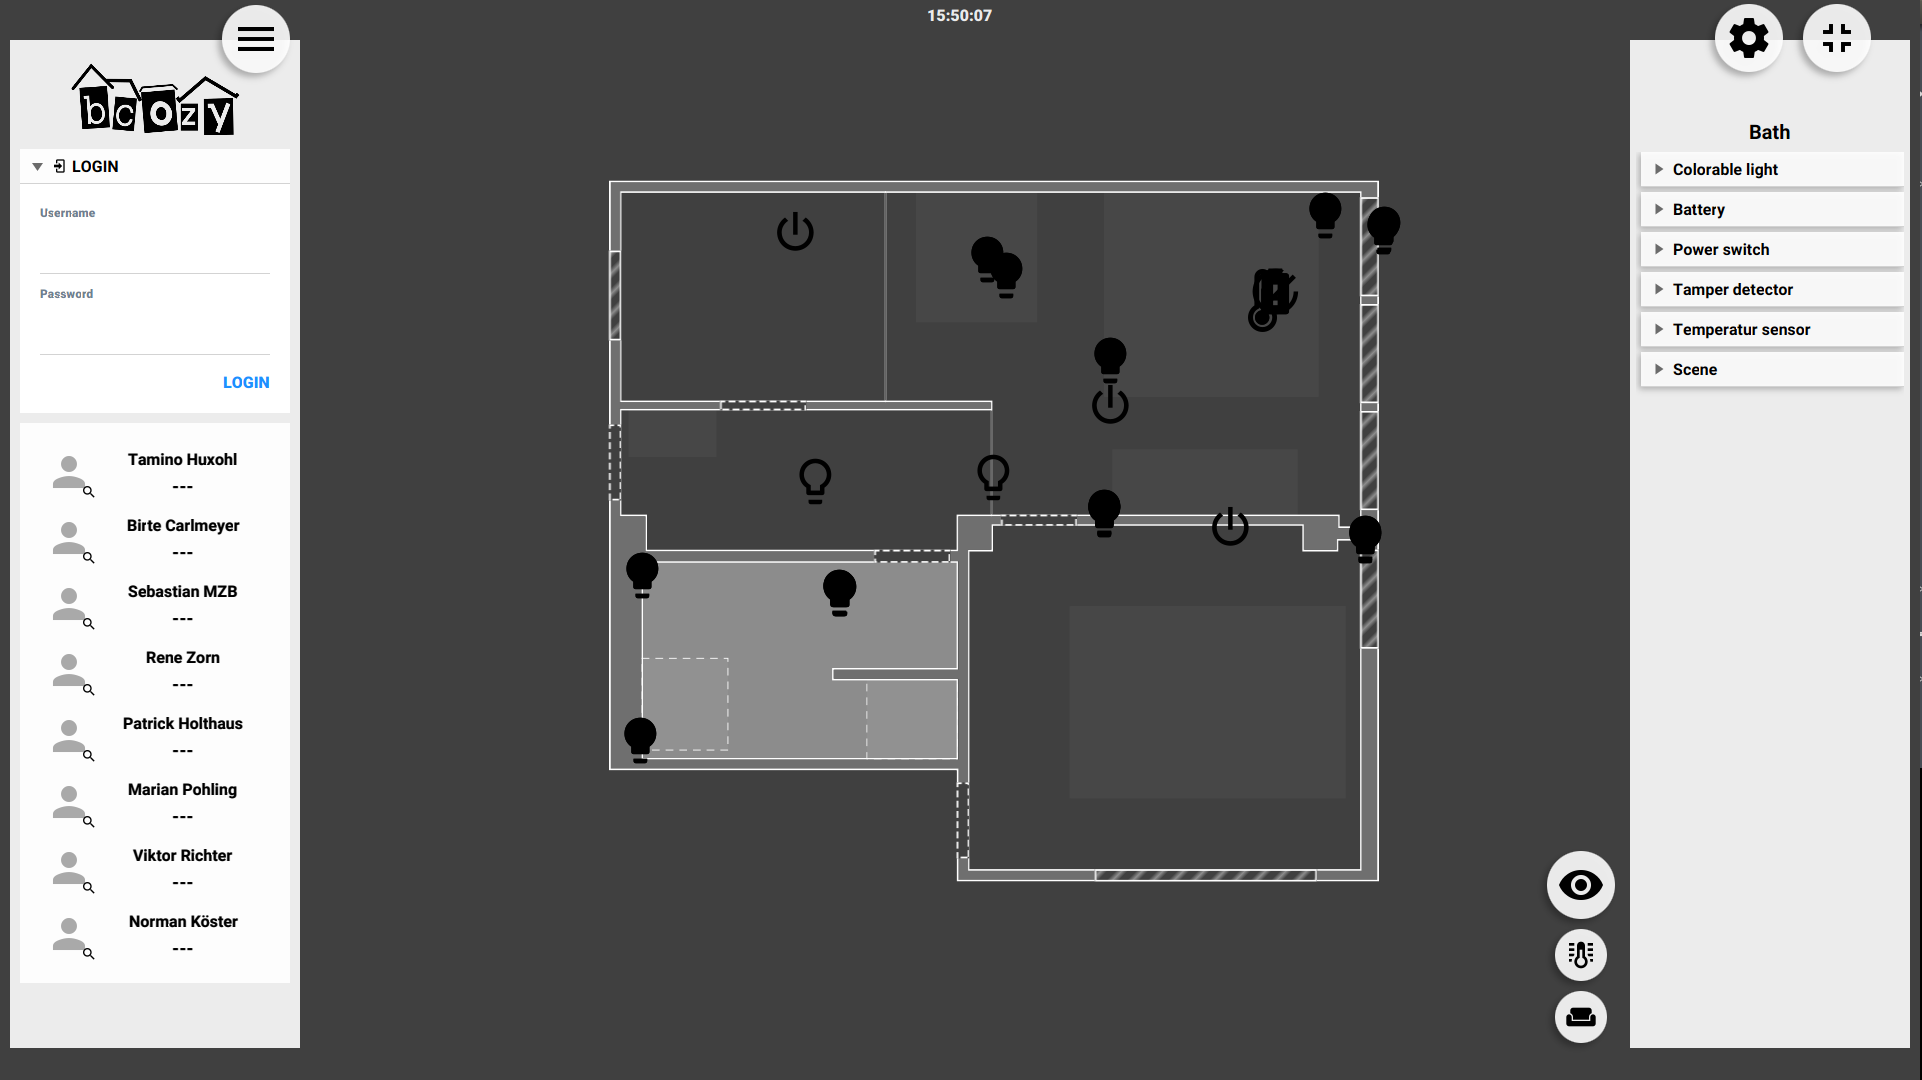
The editing layer can be opened with a click on the eye symbol. It displays all units from all rooms of all types, given they have a position and a defined symbol. Some units might not be visible if their type is not implemented yet. In future versions of BCozy this layer is supposed to allow a re-positioning of the units.
The power consumption layer can be opened with a click on the battery symbol. It displays the power consumption in a configurable way.
Room Plan Interaction
There are several ways to interact with the room plan. Single rooms can be marked by a simple click on them. After a room is selected it is possible to also click on one of its areas within the room to select. There is a visible feedback while you hover with the pointer over a room or area to visualize which one you are about to click. The whole floor plan can be moved by simple actions. First there is the option to zoom in and out of the plan by simply using the scroll wheel of the mouse input or by using the equivalent touch gesture. To move the plan to a certain direction you have to click and hold on a point of the plan and just drag it over the surface. There is also the option to automatically center and zoom into a room or a certain area by double-clicking on it. A double-click outside the floor plan adjusts the view to the complete view again.
Controlling Units on the Location Plan
The default view shows the room plan and contains control elements for lamps.
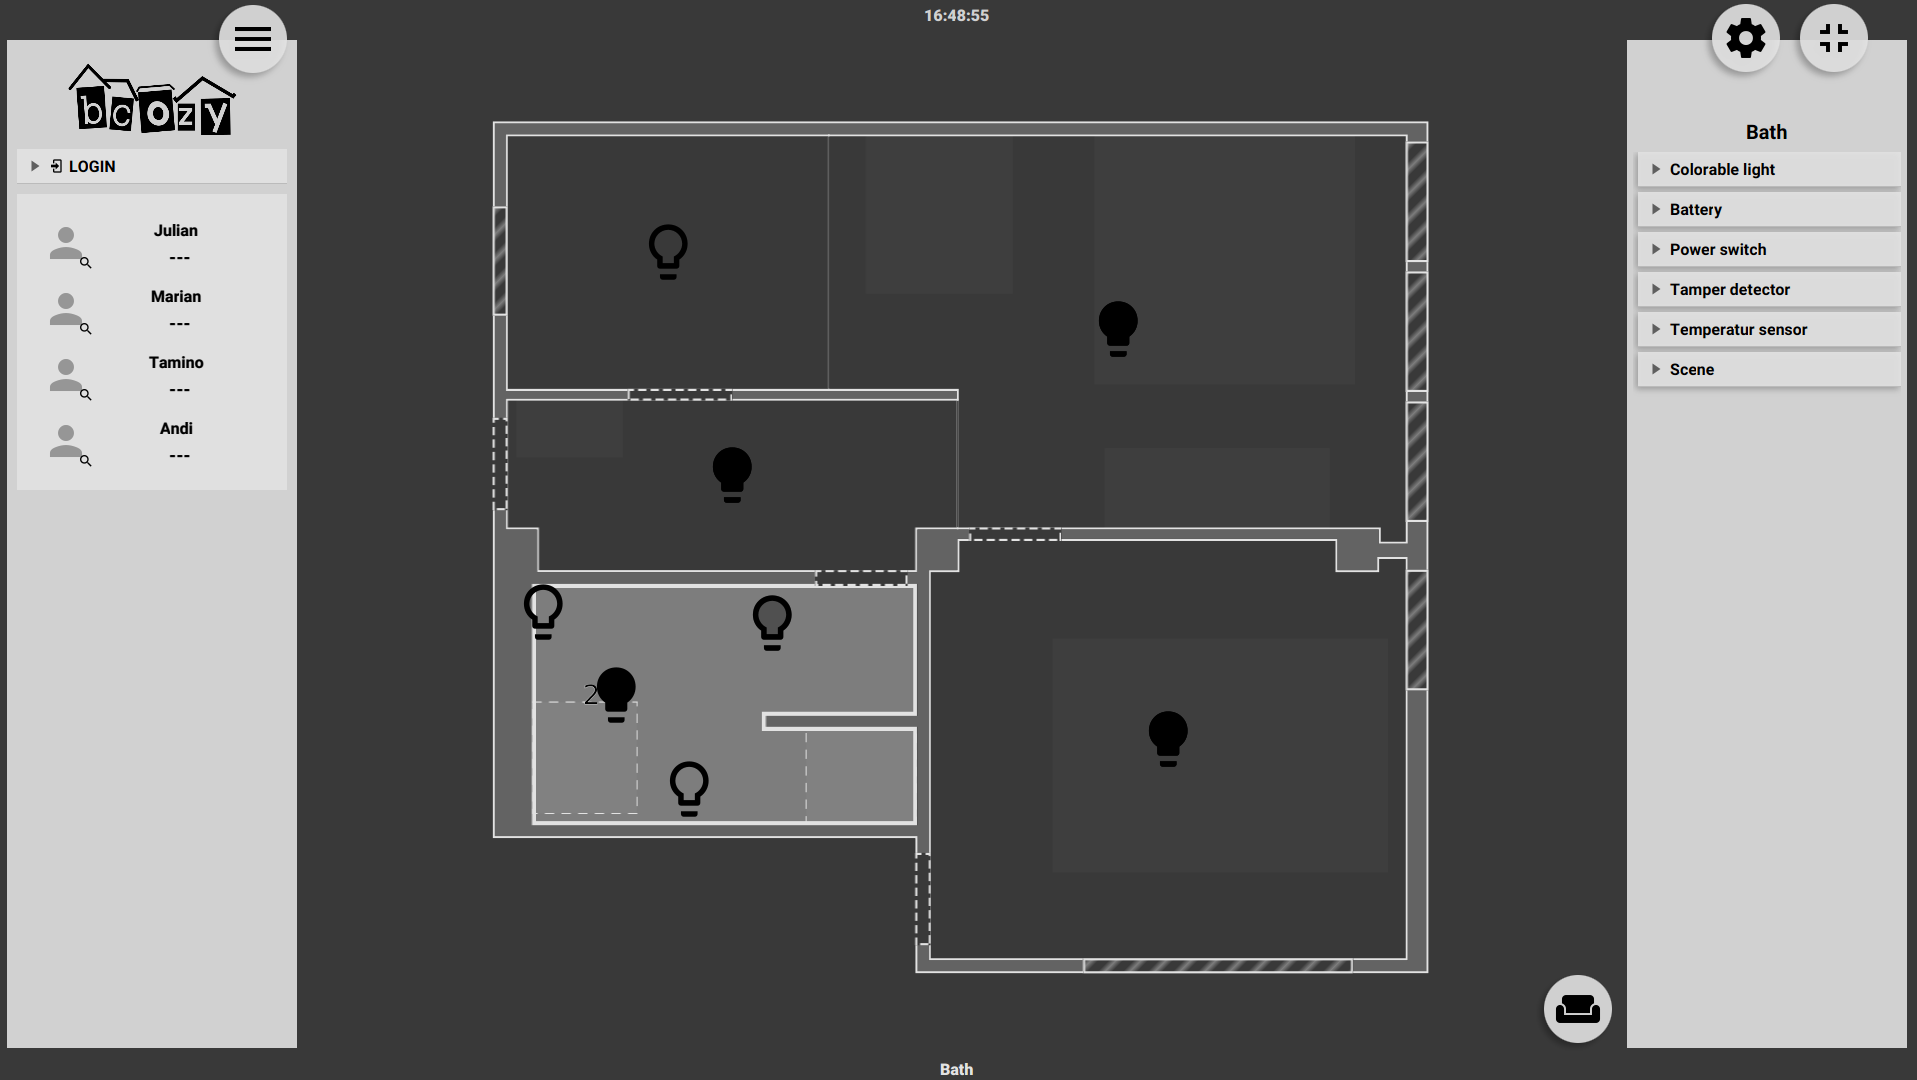
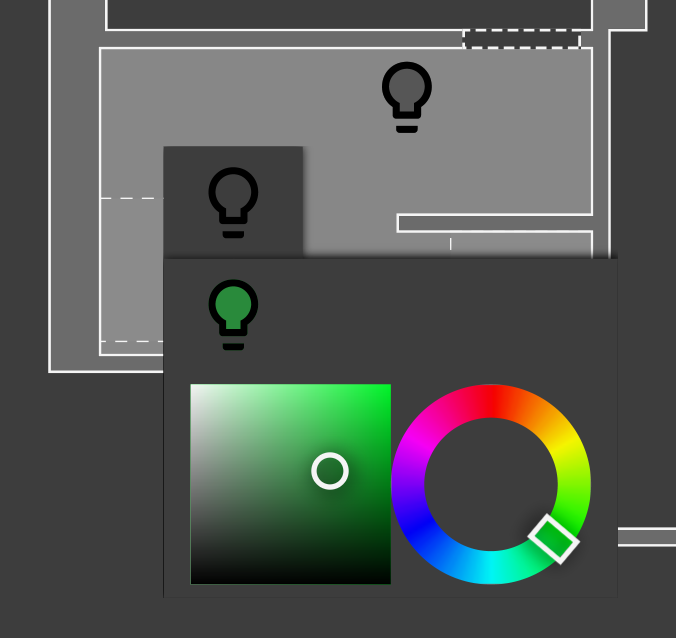
For every room there is one lightbulb-shaped button that controls all the light units in the room. If a room is selected, additional buttons are displayed: For every lamp in the selected room there is one control button. In both cases, a simple click on the lightbulb switches the light on or off. A right click opens an additional control element, if the light unit is a colorable light. It contains a color wheel and a rectangle for the hue selection. One more right click closes the color selectors.
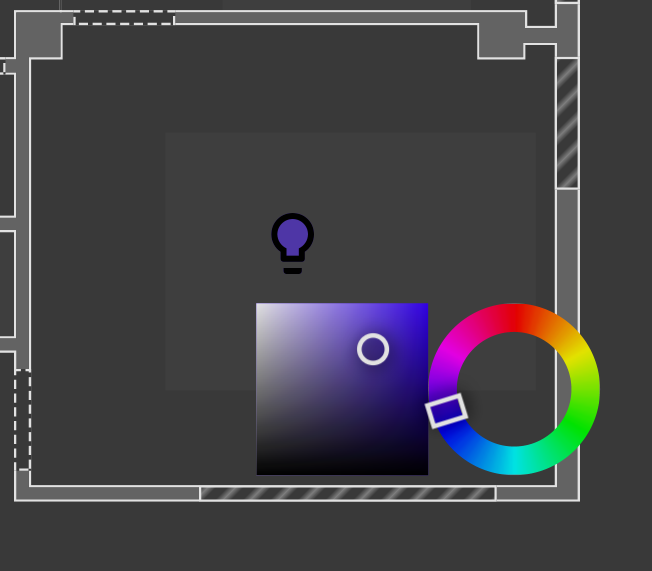
If lamps are on the exact same position, a button appears that groups these units. A small number indicates how many units have been grouped. With a click on this button, the hidden buttons for every single unit appears. The buttons work exactly like the other lamp buttons. They automatically hide again when the mouse leaves this area. This kind of grouping is only applied on this layer.
Viewing Power Consumption
The energy consumption layer displays current and recent power consumption. There are different views which themselves can be configured further. Per default the line chart will be displayed. It is possible to configure the visualization via the right sidebar.

Overall there are four different configurations possible: Changing the visualization with the first drop down menu, changing the displayed unit via the second, changing the tracked consumer with the third part and configuring the displayed date range with the last elements. Different visualizations are not capable of utilizing all of these configurational options, so depending on the chosen chart type more or less configuration elements are displayed.
The dropdown menu regarding the choice of chart type displayed allows to choose from different visualization types.
Classical Charts
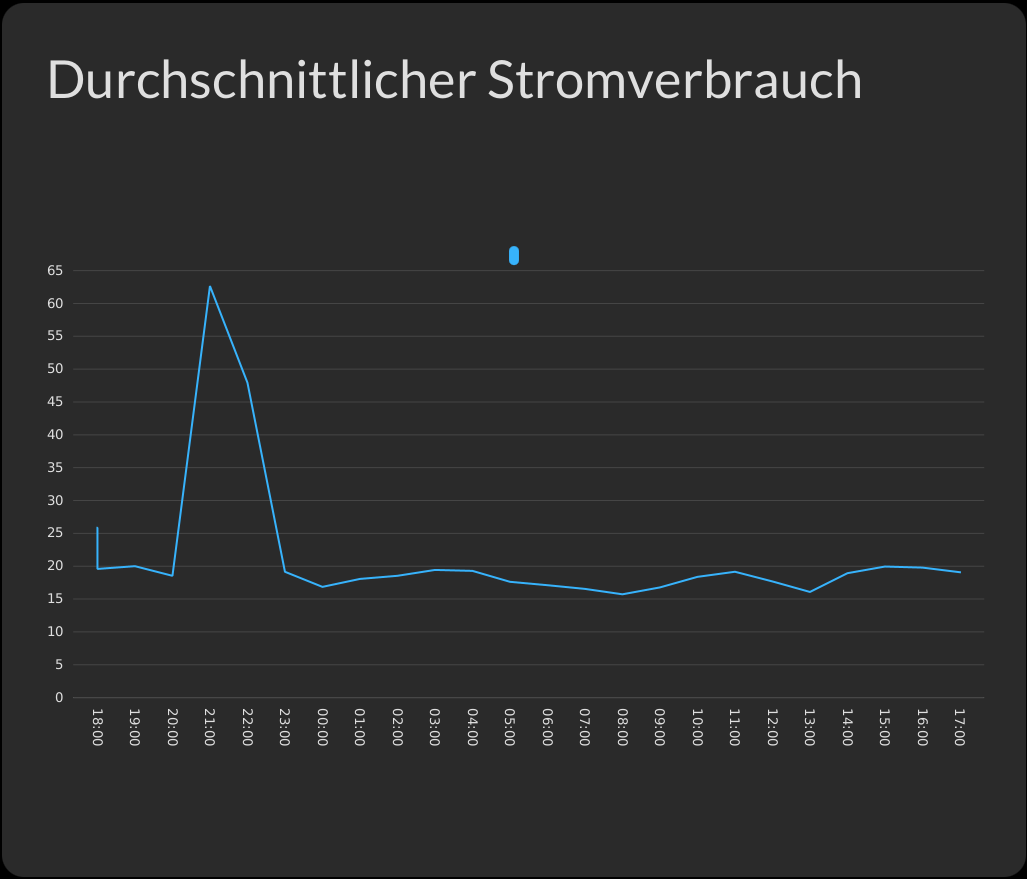
There are three different classical chart types:
- The line chart displays power consumption as a line chart
- you can choose time-range, unit and consumer of the visualization.
- The bar chart displays power consumption as a bar chart
- you can choose time-range, unit and consumer of the visualization.
- The pie chart displays the most recent consumption as a number inside a circle
- you can choose unit and consumer of the visualization.
Tree
The tree visualization shows the current power draw in a metaphor as the trees health. The more power is consumed the less leaves the tree bears. Also, the leaves begin to brown with increasing consumption. Overall, there are eight possible states of the tree displayed.

Heatmap
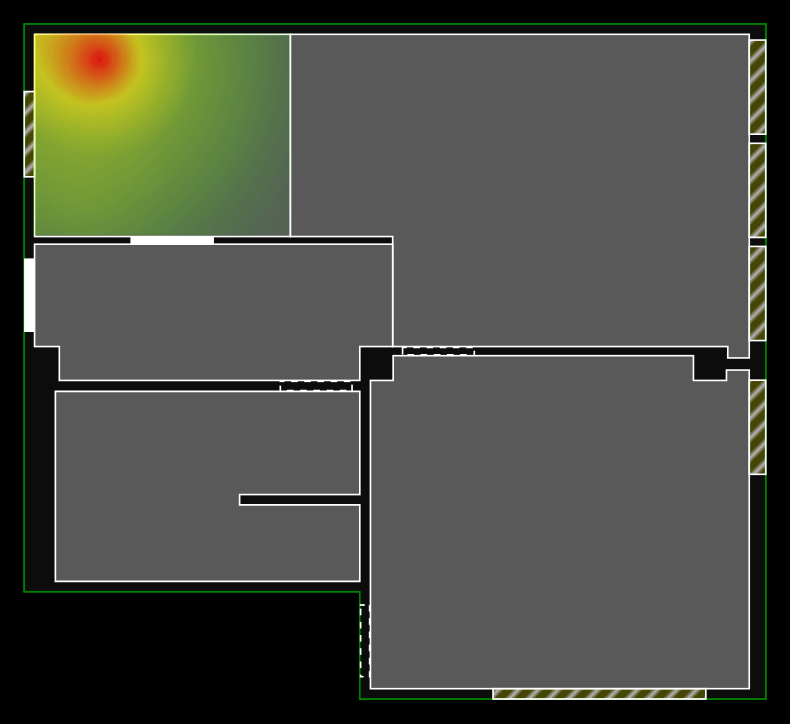
The heatmap displays consumption of the consumers in the room plan. Depending on the consumption of the consumer his location in the room plan shines from green over yellow to red. So the heatmap helps to identify areas of high power consumption density. This feedback can be useful to detect malfunction or other unintended operation behavior of devices.
Consumer Selection
The consumer selection consists of a checkbox for displaying the global consumption and two optionally displayed dropdown menus for selection a location or a single consumer to query.
Date Range Selection
The selection of the displayed date range allows to select start and end date of the displayed time range. When the Current Consumption checkbox is selected the datepickers are not shown and the averaged consumption of the past hour is visualized. The interval of displayed data points is automatically chosen to improve usability.
Main Menu
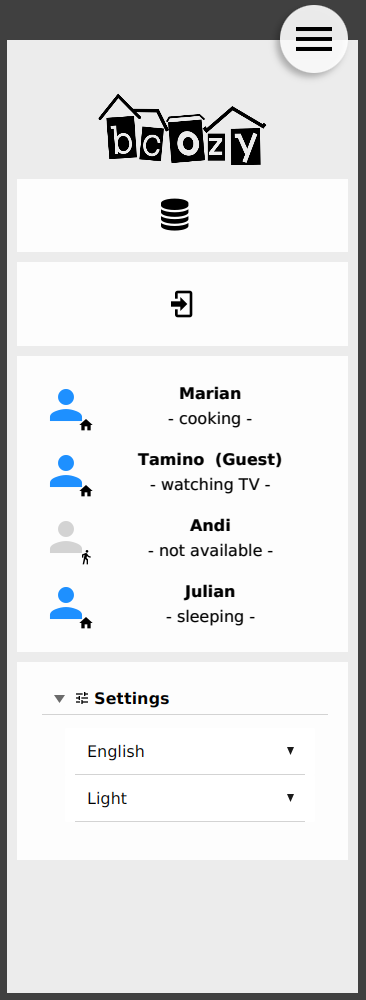
On the left side of the interface the main menu is placed. The menu has two different appearances. These are the expanded standard view where every element is fully shown and the retracted view where just the icons of the menu sections are still visible to have a wider view of the floor plan. The first element of the menu shows the connection state to the database and the apartment. Underneath the user login screen is placed to log in with your account. This screen is followed by the user control where all logged in users of the apartment are shown with their current state of action. At the bottom of the menu there is a small settings area to change the language or the theme.
Connection State Icon
To visualize the current state of connection two different icons are shown. These icons stand for ‘connected’, ‘connection problems’. Additional to these, little arrows pointing up or down are shown to visualize whether data is send or received.
How to Login as a User
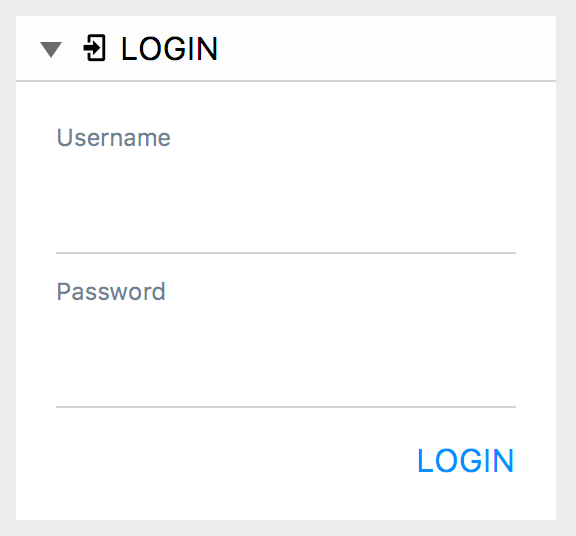
To log in as a user you must simply provide a username und password inside the login area. Afterwards click on the login button. If you want to log out the current user click on the logout button.
The Settings Menu
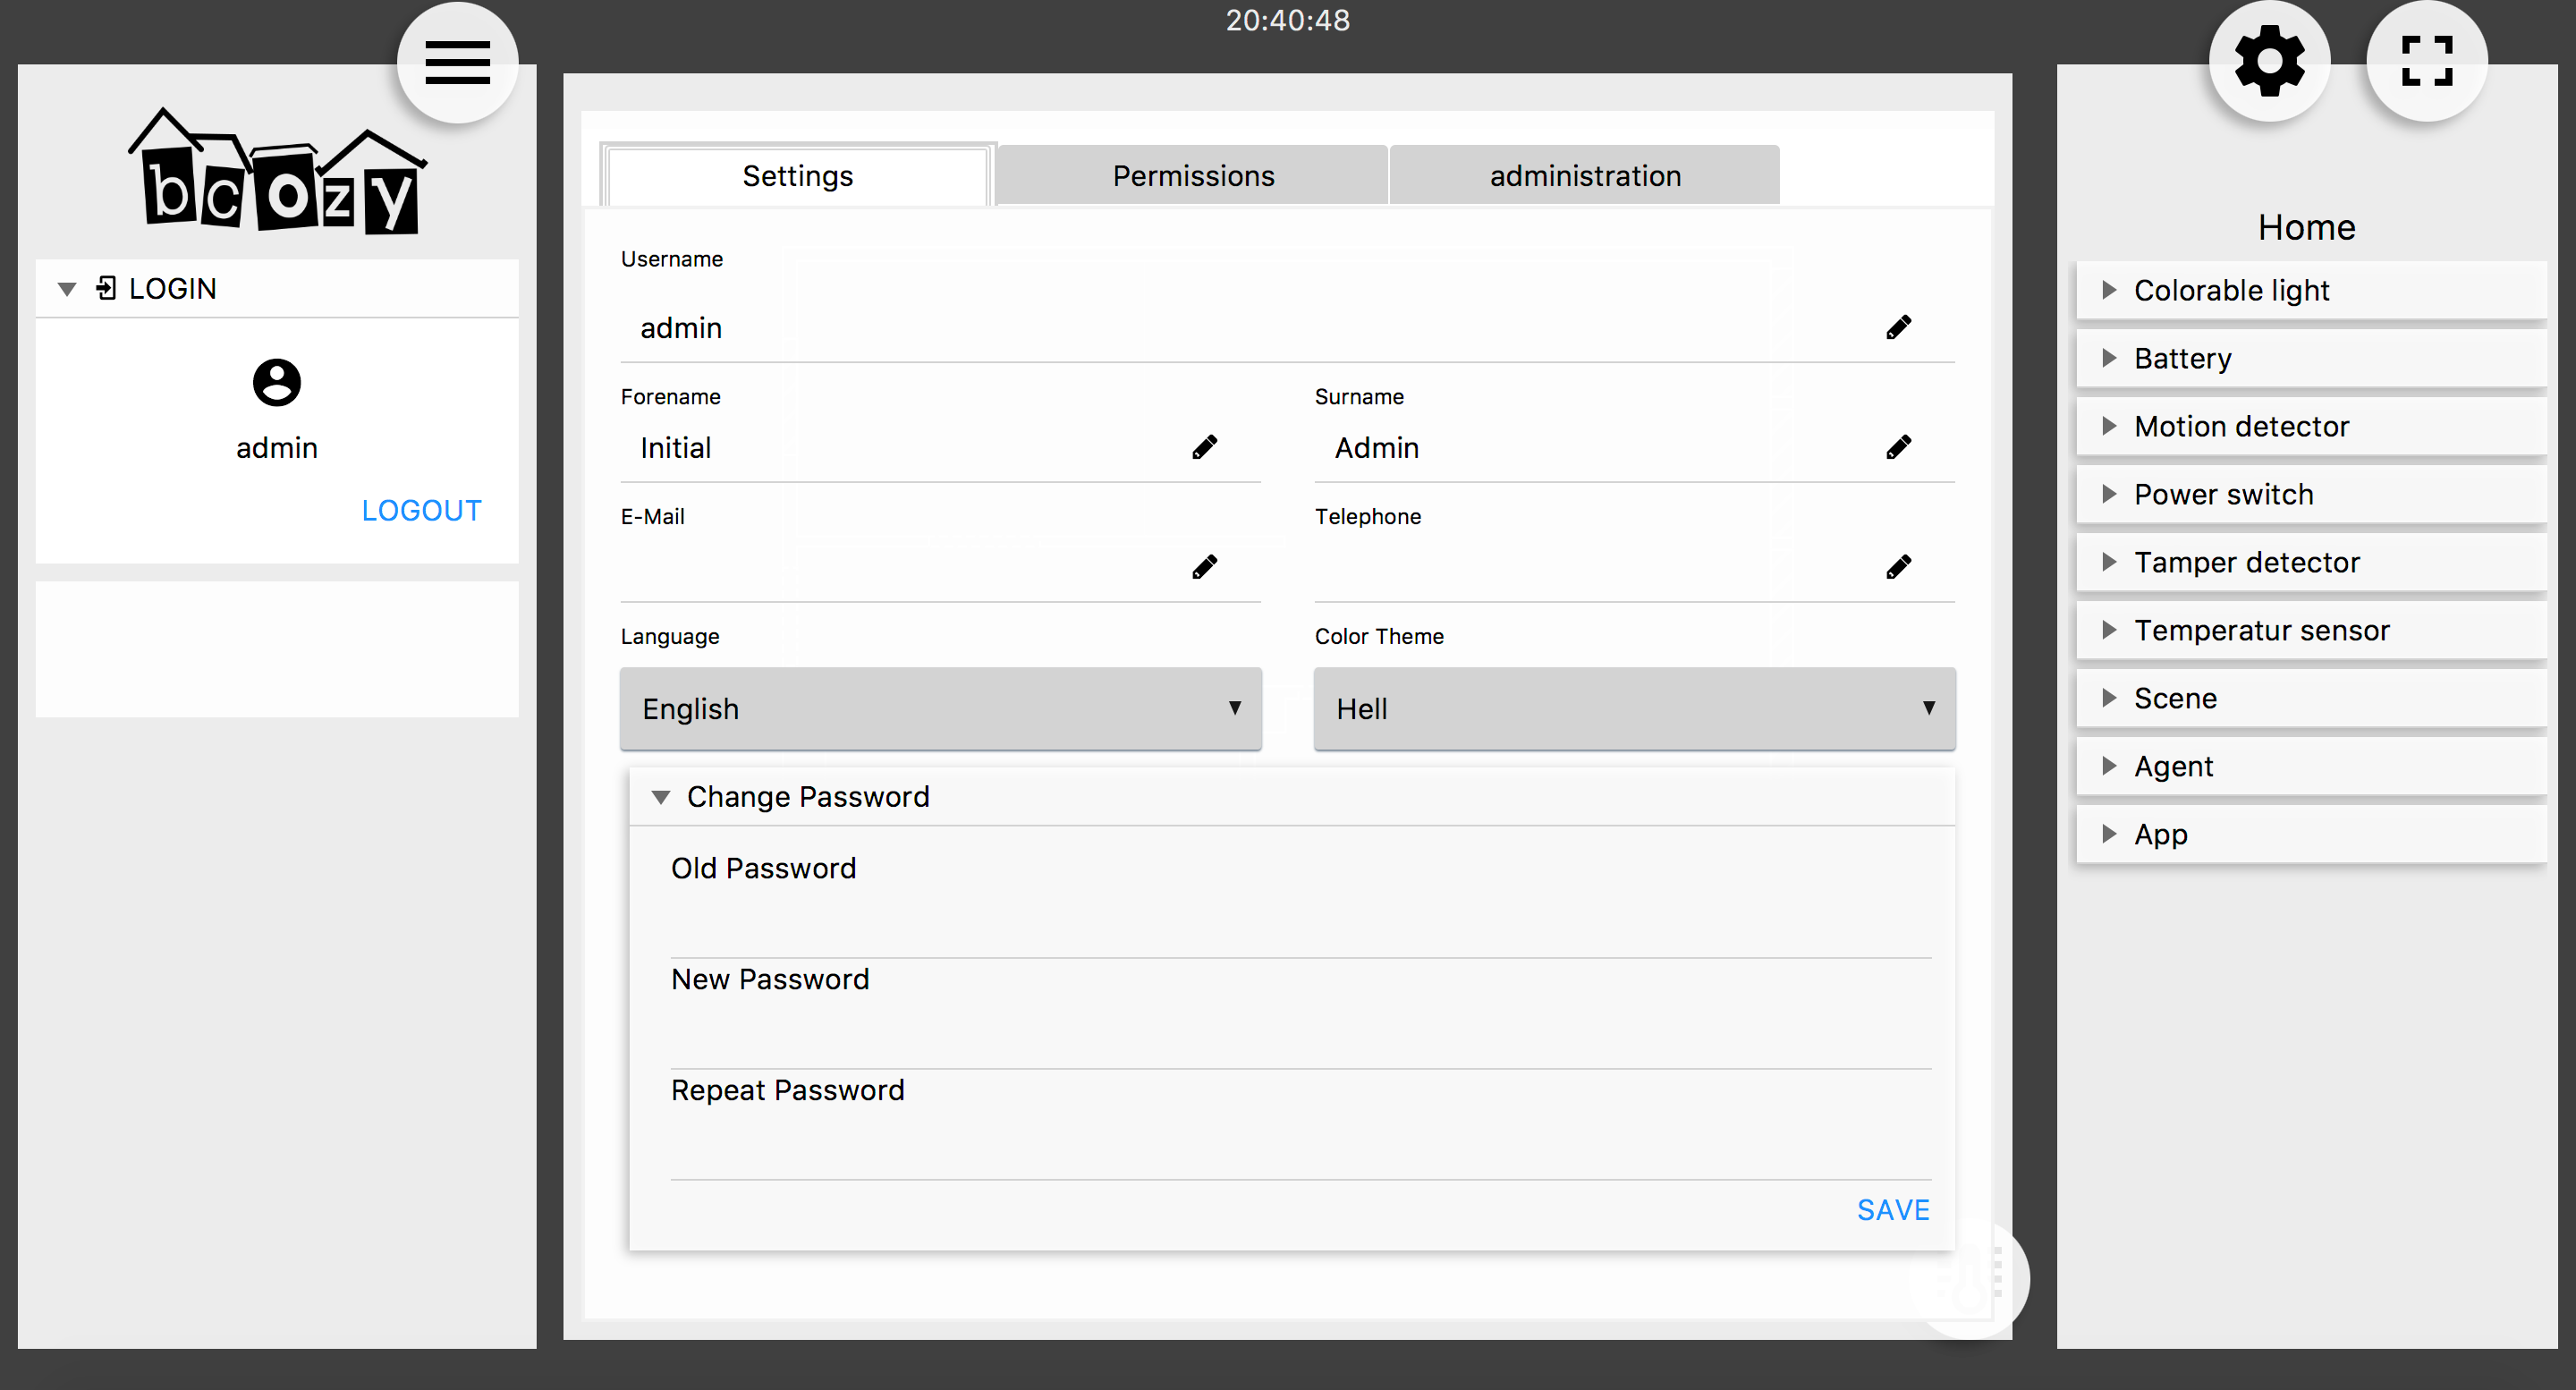
If you want to change any settings regarding the appearance of BCozy itself (e.g. theme or language) or change the settings of a user account or any other unit, you need to open the settings menu. This can be accessed through a button at the top right corner of your screen.
Changing Your Own User Data
When logged in as a normal user (not admin) the settings menu will only offer you a single pane. This one allows you to modify your own data, the appearance of BCozy and your password.
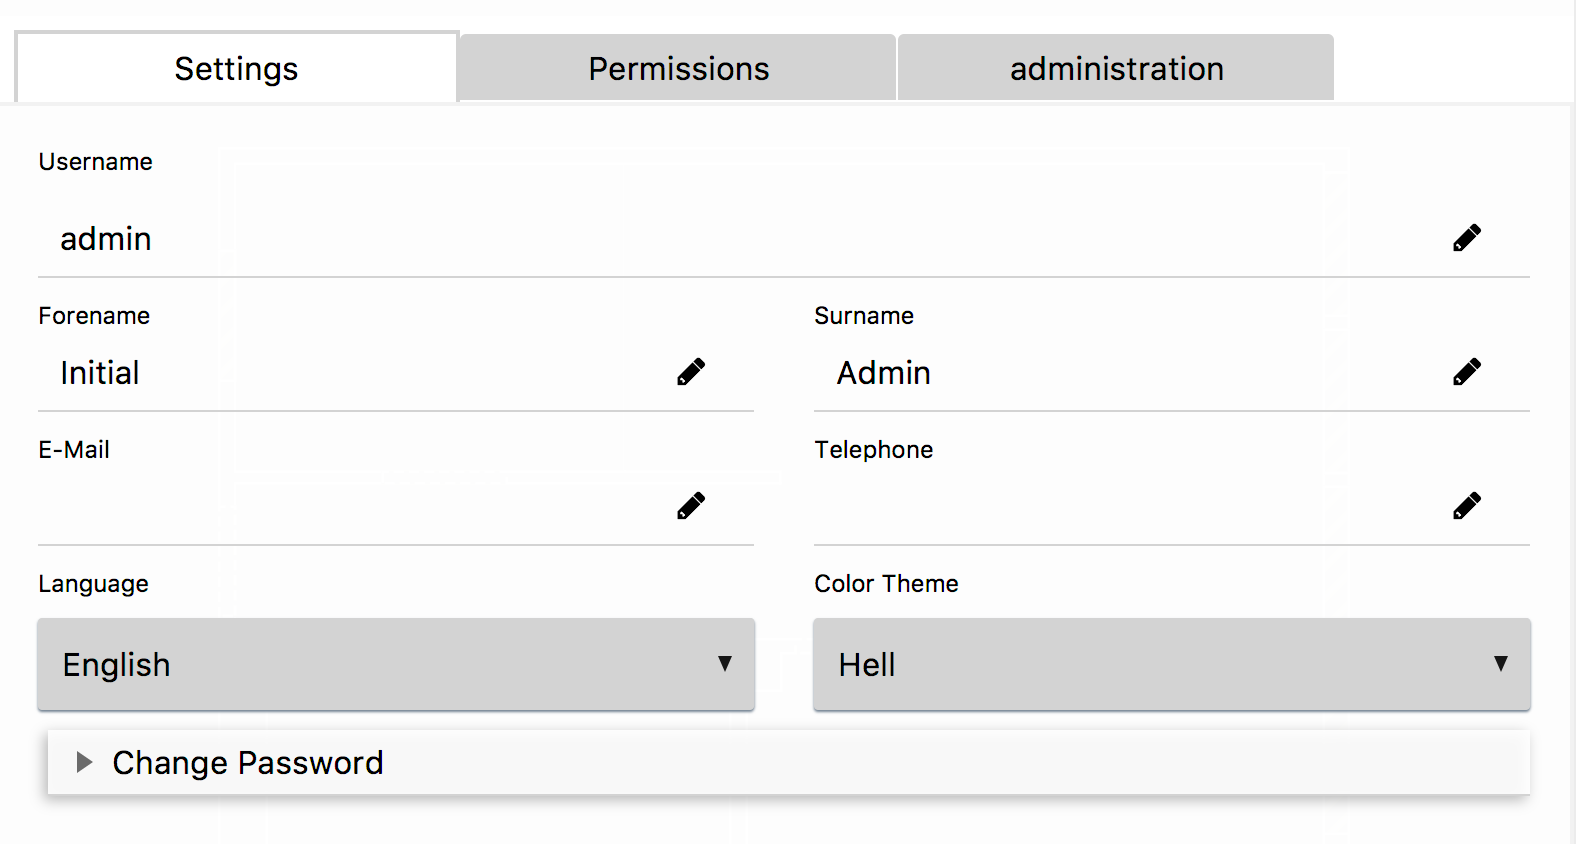
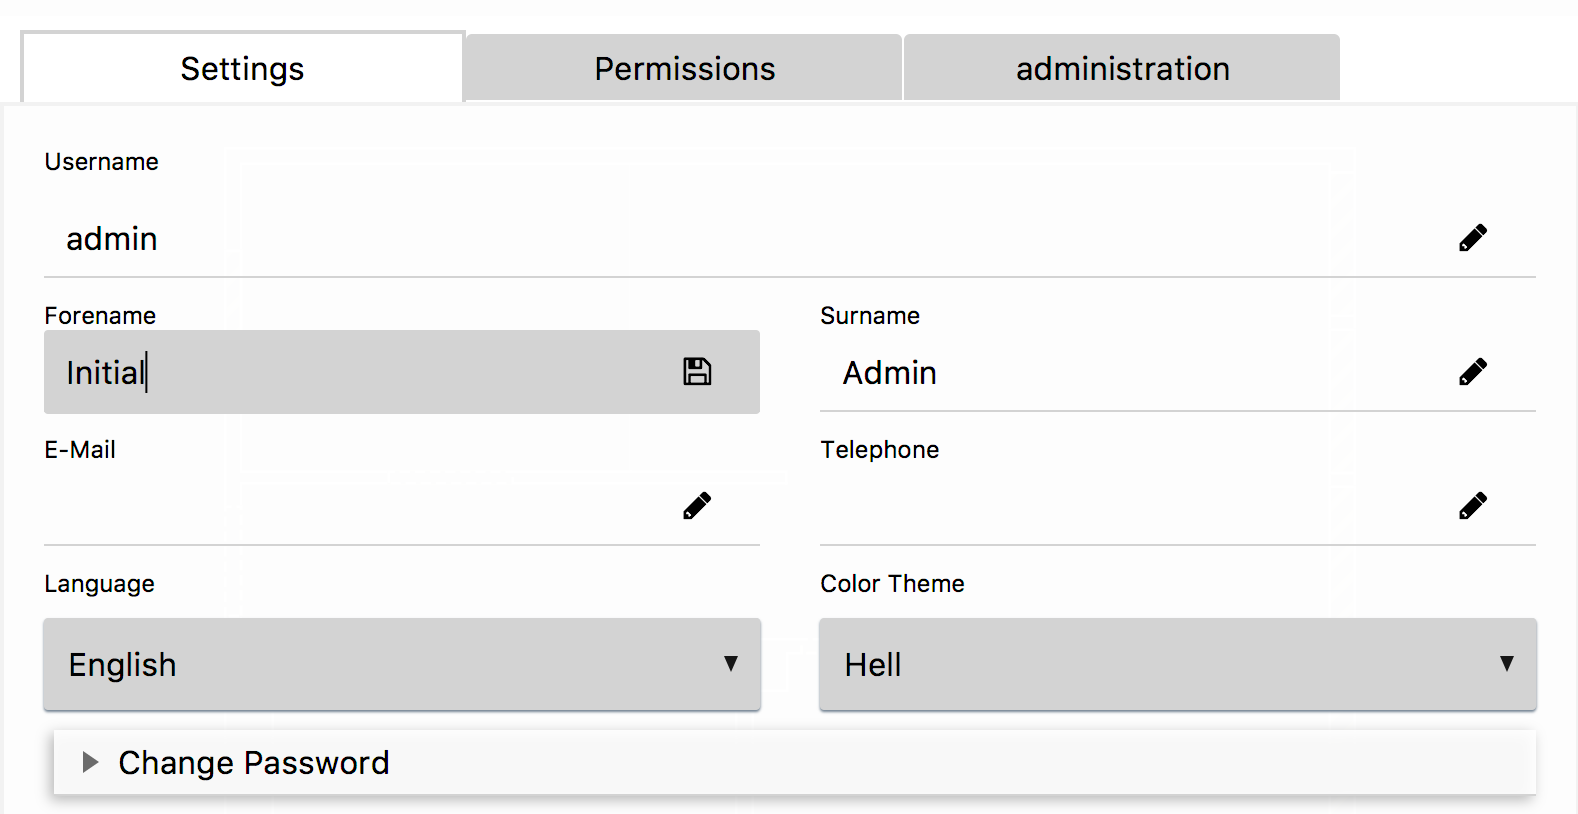
Any data you might already have provided to BCozy will be displayed inside the input fields which will not be modifiable at first. To change any of this data just click the pencil icon inside the corresponding input field. The icon will change to display a floppy disk and you will be allowed to modify (or initially provide) the data.
To save, just click the floppy disk icon.
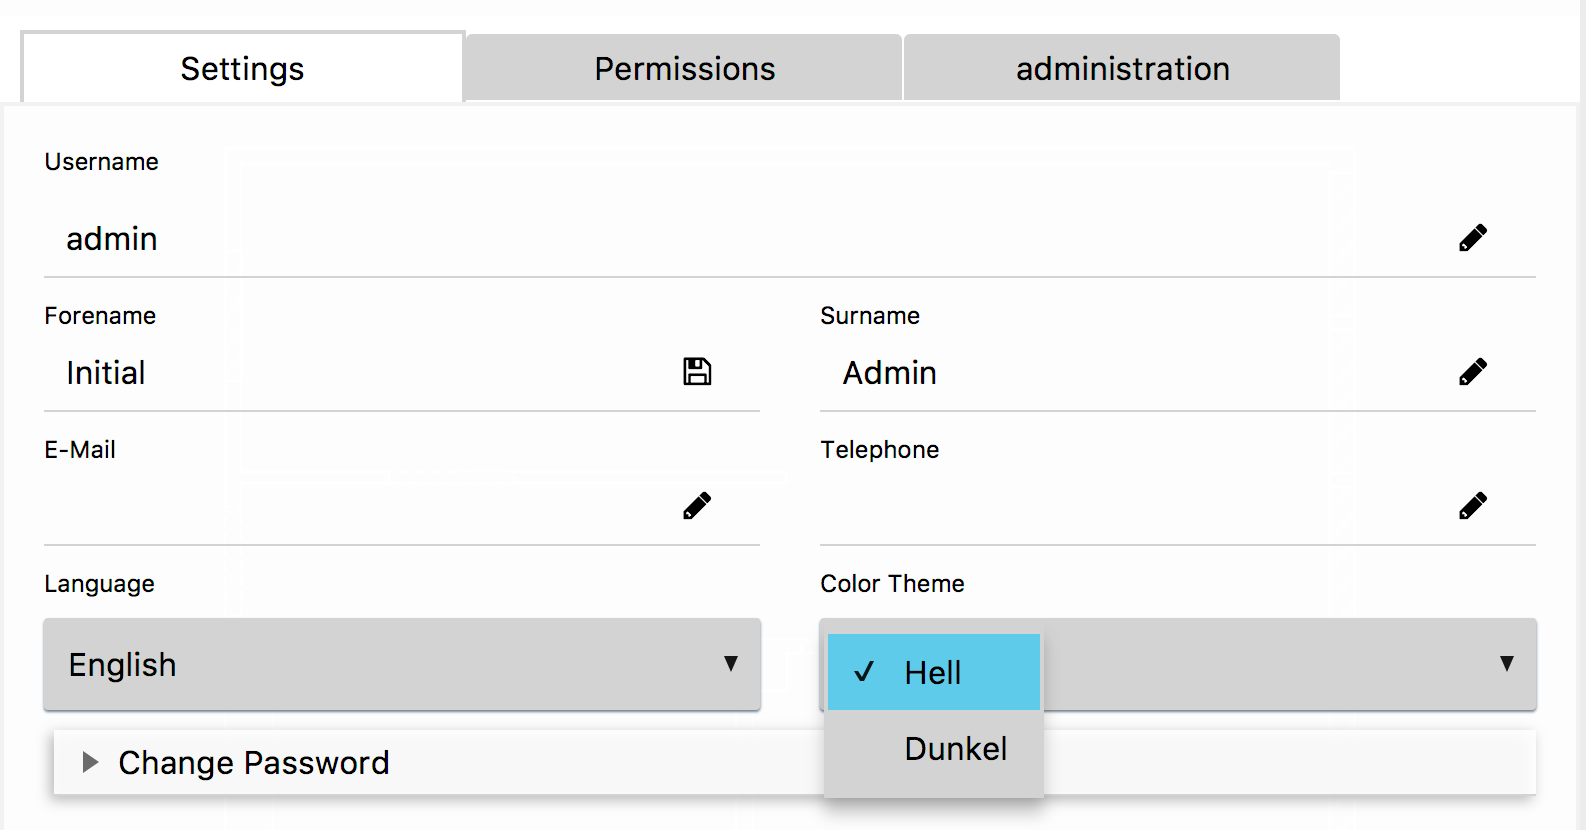
How to Switch a Theme
To switch the theme to another defined theme you have to click on the theme pull down menu and just select the theme that should be active.
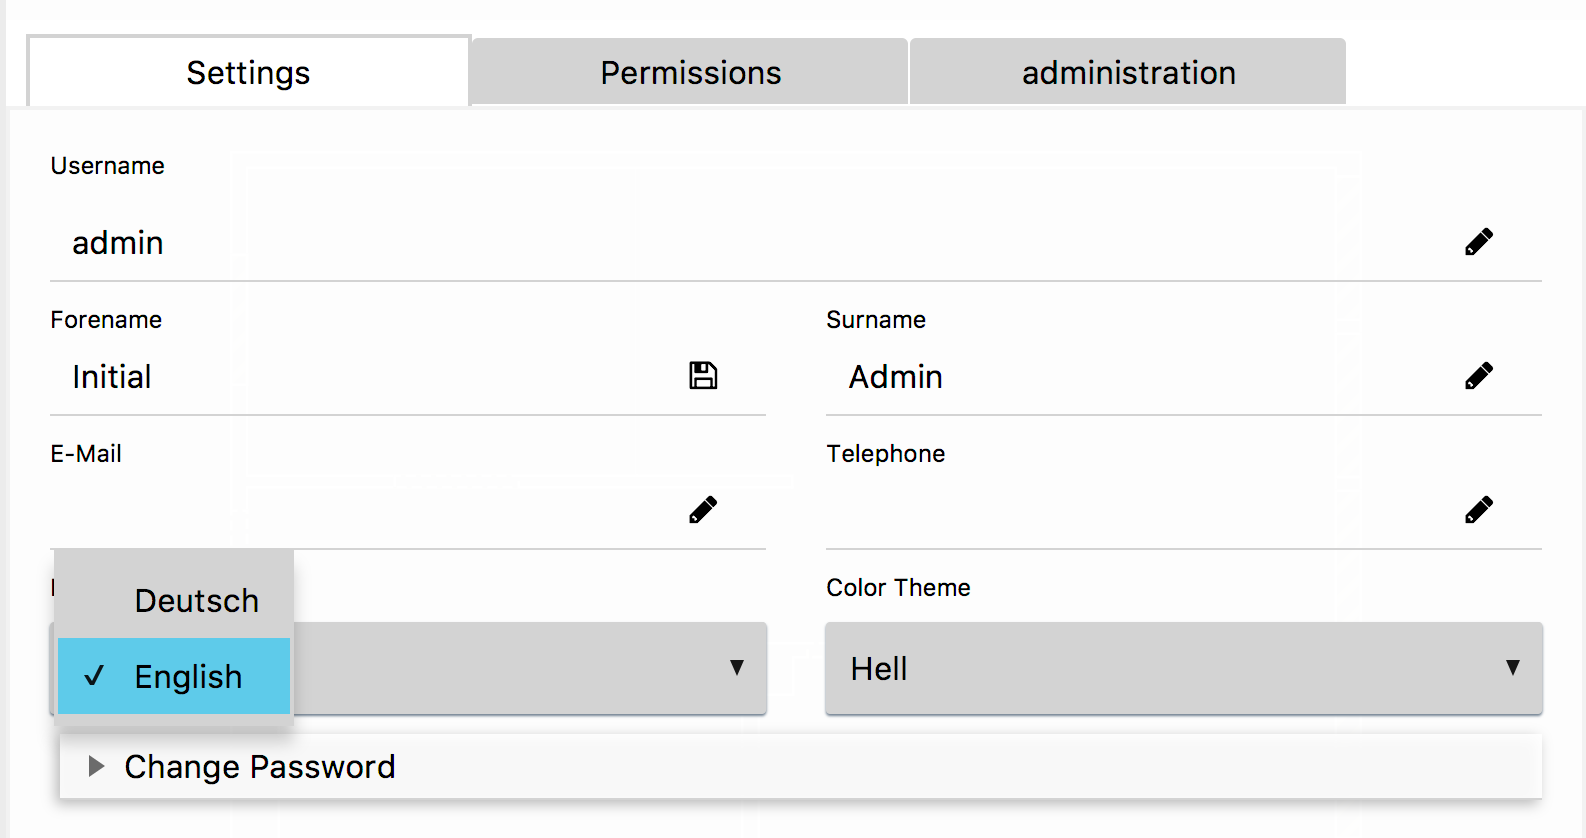
How to Switch the Language
To switch the language to another defined language you can click on the language pull down menu and just select the language that should be active.
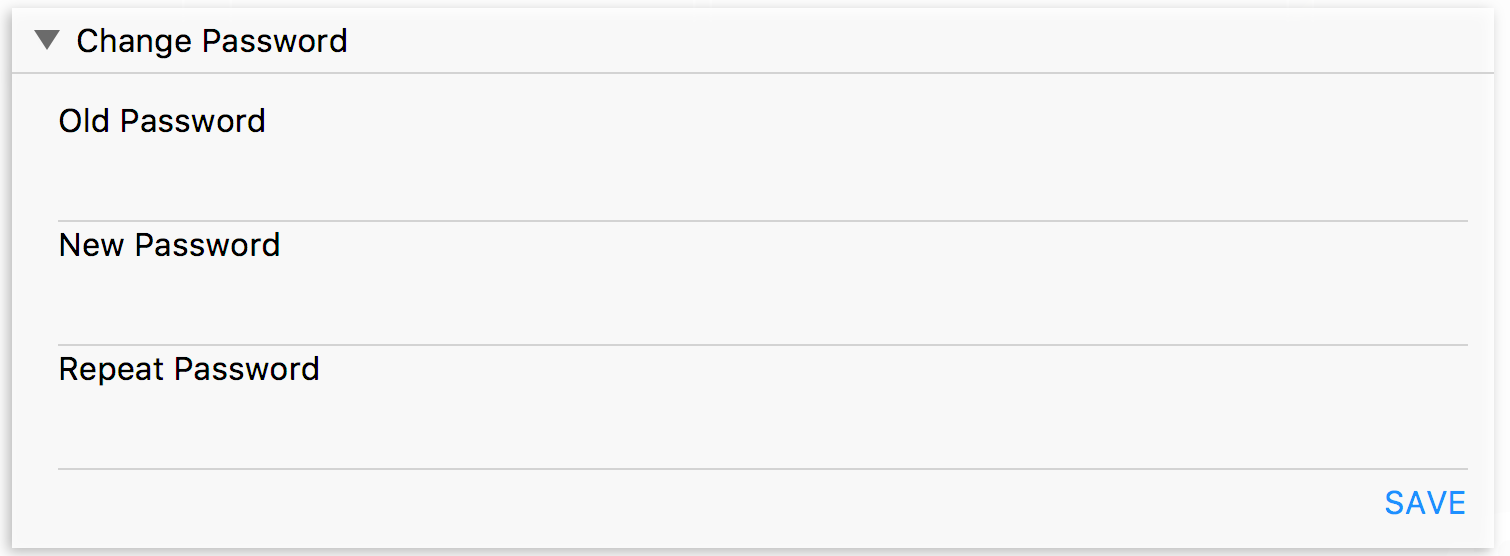
How to Change the Password
Your password can be changed by expanding the Change Password Panel by clicking on its label. This will provide you with three input fields where you will have to enter your old password at first and your new password twice afterwards. Clicking the save button will save your new password if the following conditions apply:
- Your old password must match the actual password that is currently set for your account
- The new password must have been entered identically twice
(new conditions might follow in the future)
The user interface will inform you wether or not the change was successful.
Administration Settings
Opening the settings menu logged in as an Admin will provide you with two additional tabs. One to adjust access rights on units and one to manage user accounts.
How to Adjust Access Rights on Units
All devices that can be controlled via BCozy are called units. So are rooms, areas - basically everything inside BCozy is a unit. Access rights determine what users can see and do inside BCozy and which devices they can control. To change access rights on units open the Access Rights tab. It will display a table listing all available units. Those are grouped by their type, to see all units inside a group simply click on it to expand the view. A search field at the top of the window will help you to easily find whichever unit you are looking for.
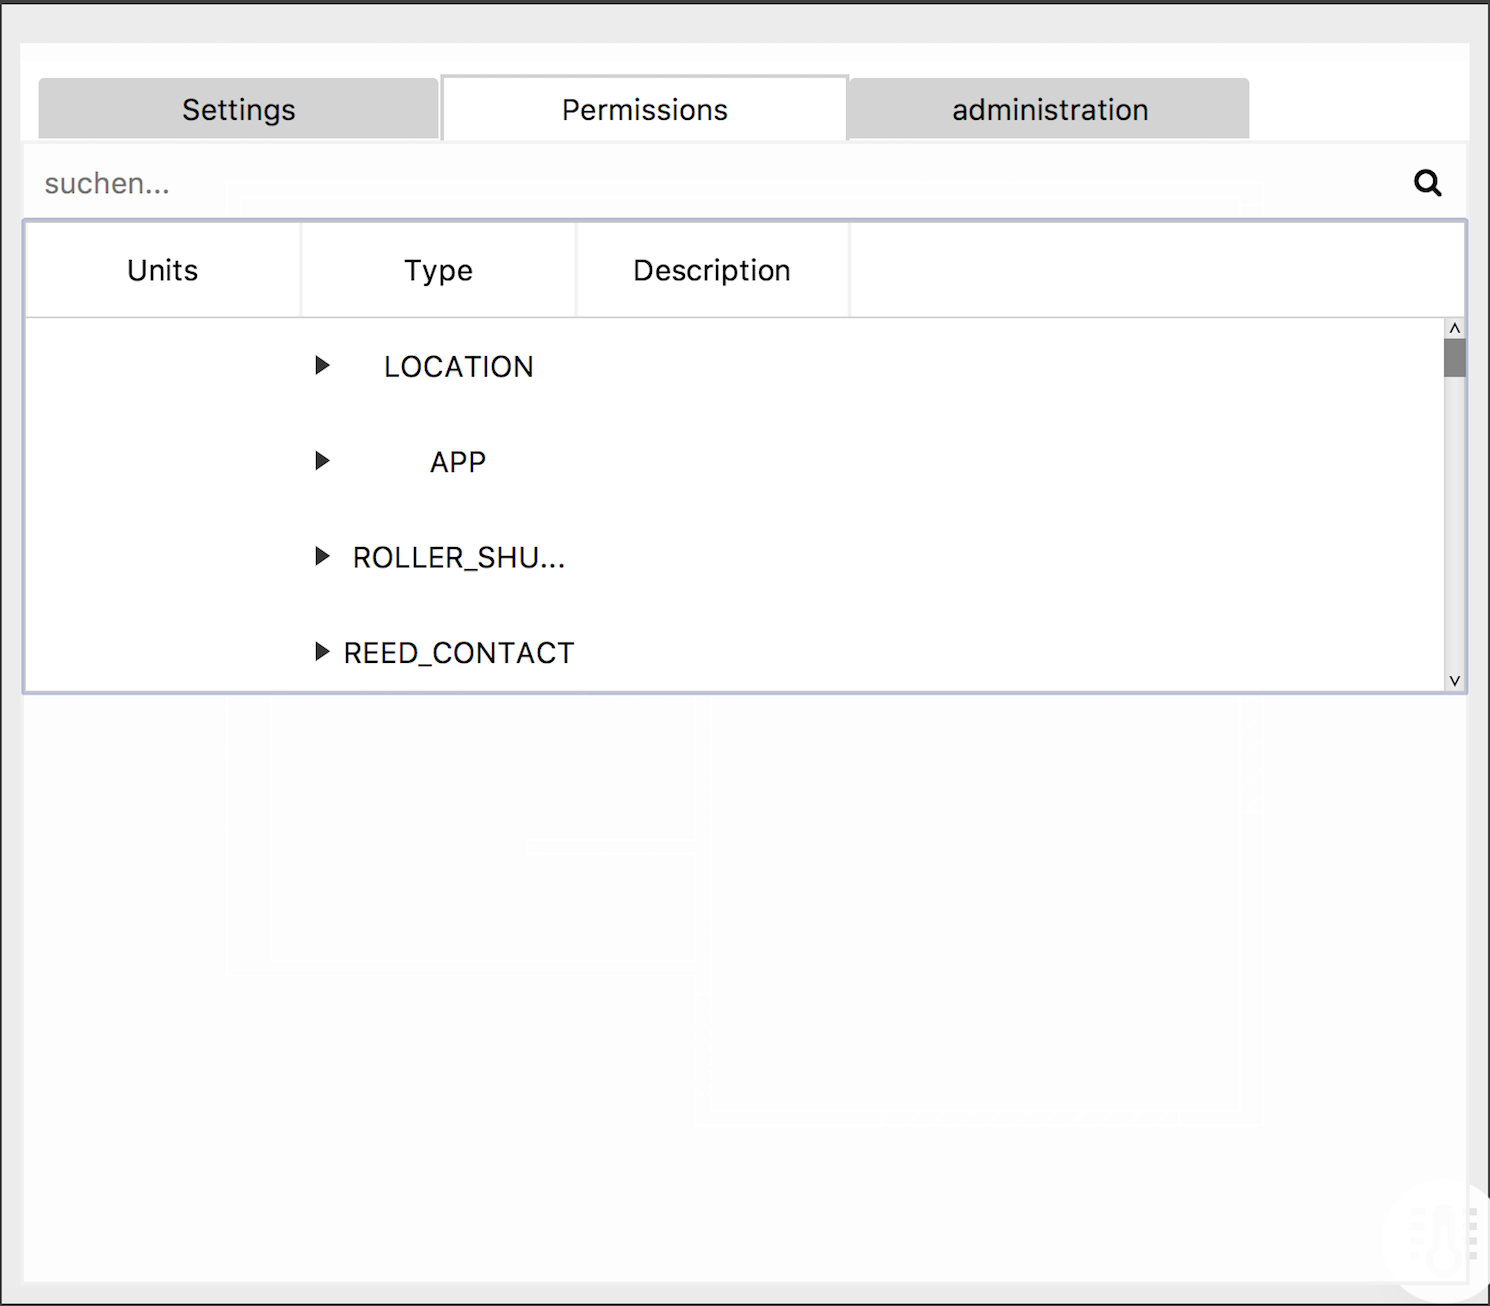
Selecting a unit inside the table will open another table displaying a list of all available authorization groups and their rights on this unit. The first row contains a dropdown menu over which an owner can be chosen for this unit. Other is not a group but defines the rights for all users that do NOT belong to any other groups that have rights on this unit. To define rights select or deselect the corresponding checkboxes.
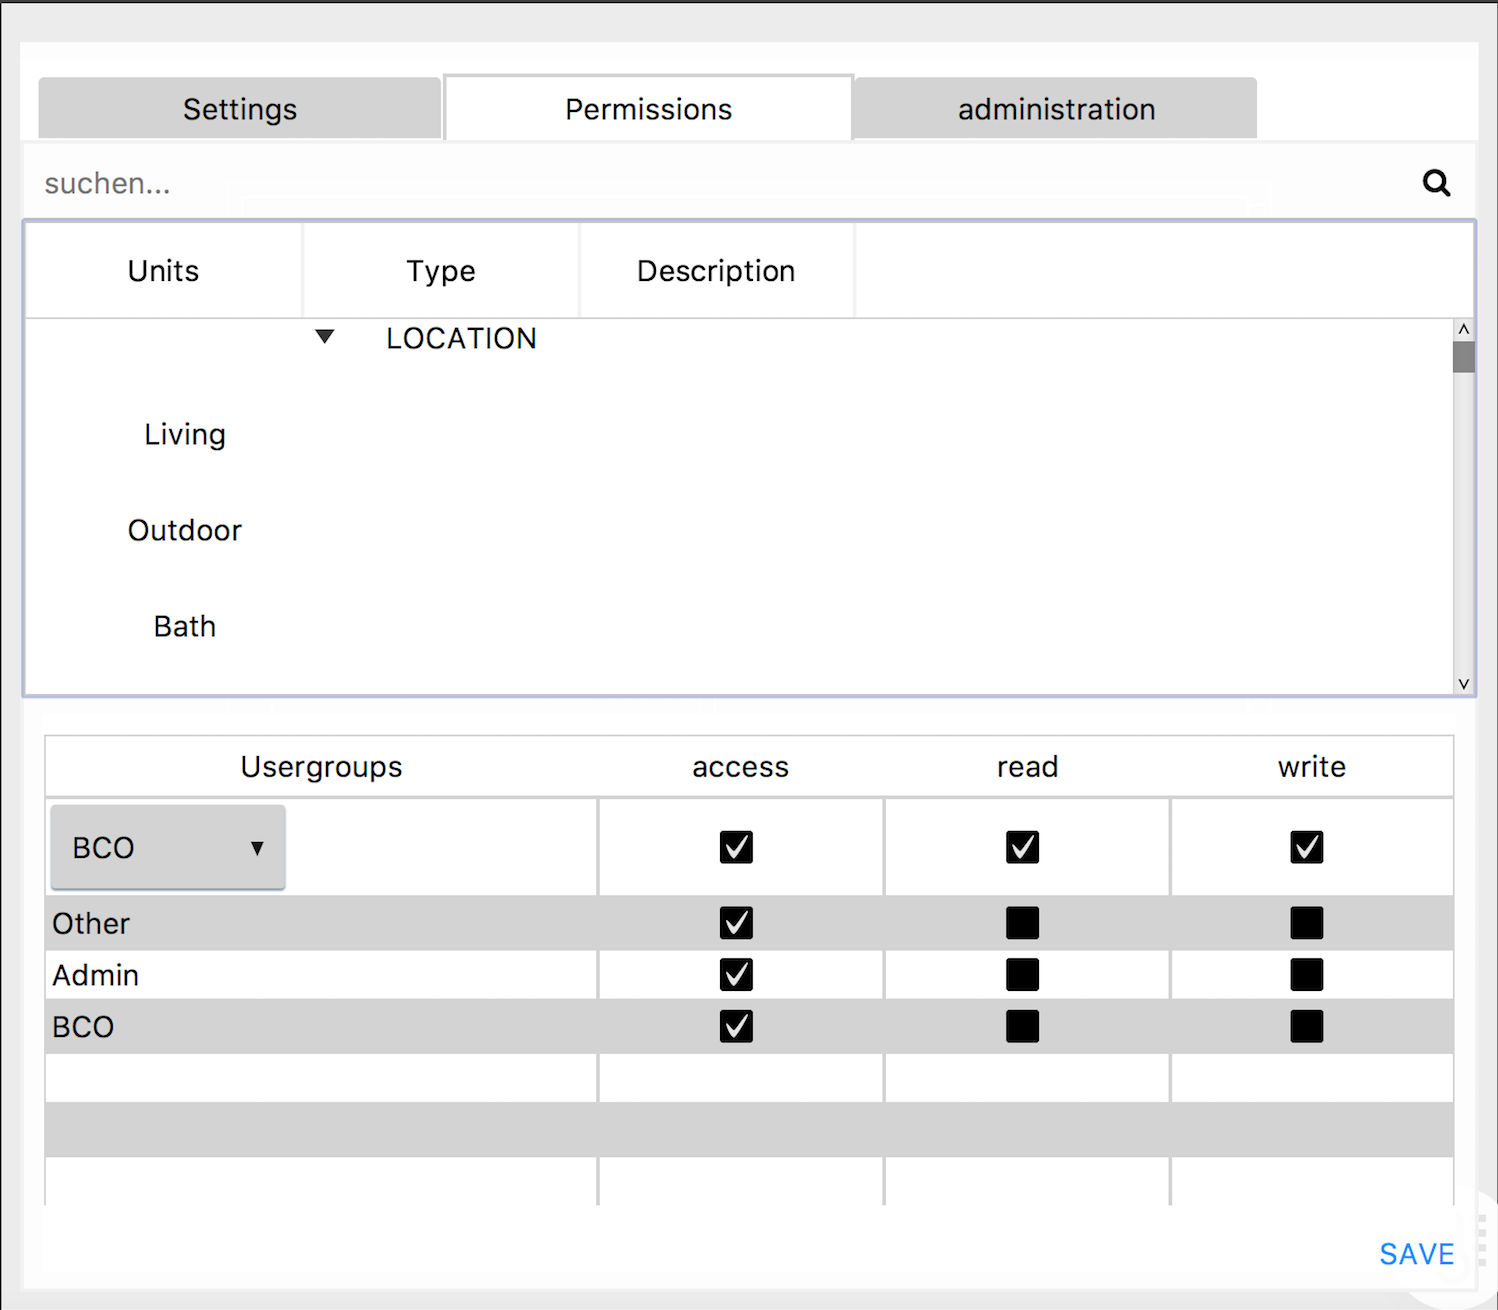
Permission Types and Their Meaning
This section describes the differences of read, write, and access permissions and their implications on the user's or client's actions. The implications of the permissions are oriented towards and thus very similar to those of the standard Unix permissions.
Location Permissions
| Unix Directories | BCO Locations | |
|---|---|---|
| R | read content | read internal unit configs |
| W | write | change configuration |
| X | access | change status/apply actions & see internal unit ids |
Unit Permissions
| Unix Files | BCO Units | |
|---|---|---|
| R | read | read status |
| W | write | change configuration |
| X | execute | change status/apply actions |
Read
Read permission allows the user or client to see the status of a unit e.g. if a light is turned on. If a user has write or access permission he should also have read permission.
Write
Write permission grants a user write access on a given unit. This means the user is allowed to change the configuration of a unit like its label or accessibility. Having write permission does not imply automatic access permission.
Access
Access permission grants the user the ability to use units. For example, with access permission for a light bulb a user can switch it on and off. Having access permission does not imply automatic write permission. Units
General
If the permissions of a unit are not defined the permissions of the parent location are used instead.
Clicking the save button will save your selection and the user interface will inform you wether or not it was successful.
How to Manage User Accounts
To manage user accounts, e.g. create a new account, change data of an existing account or delete one, open the Administration tab. Open the User Management panel by clicking on its label. In the dropdown menu you can either choose new user to create a new account or choose an existing username to display the corresponding data.
When creating a new account you will have to provide all necessary data, including:
- Username
- First and Lastname
- E-Mail Address
- Password
you can optionally also provide a telephone number and authorization groups to add the new user to. Furthermore you can declare the new user to be an admin by selecting the admin checkbox or declare him an occupant of the apartment by selecting the occupant checkbox. The user interface will inform you if you missed a mandatory field.
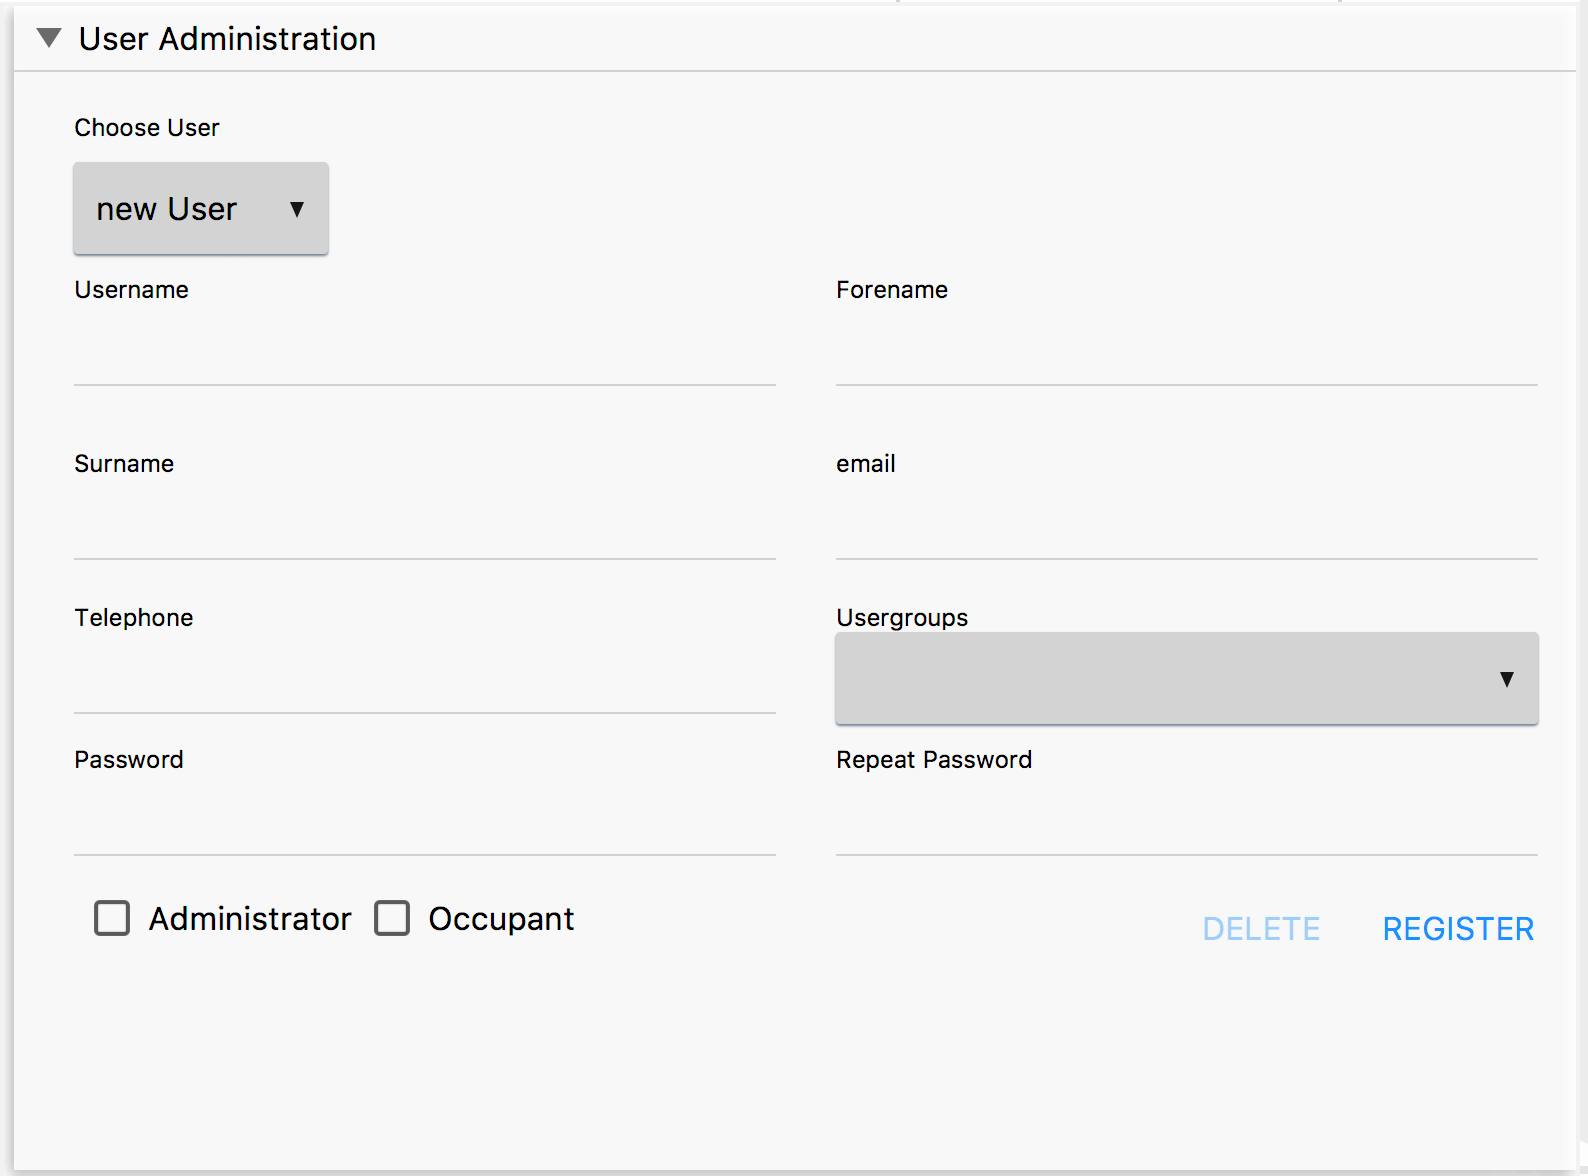
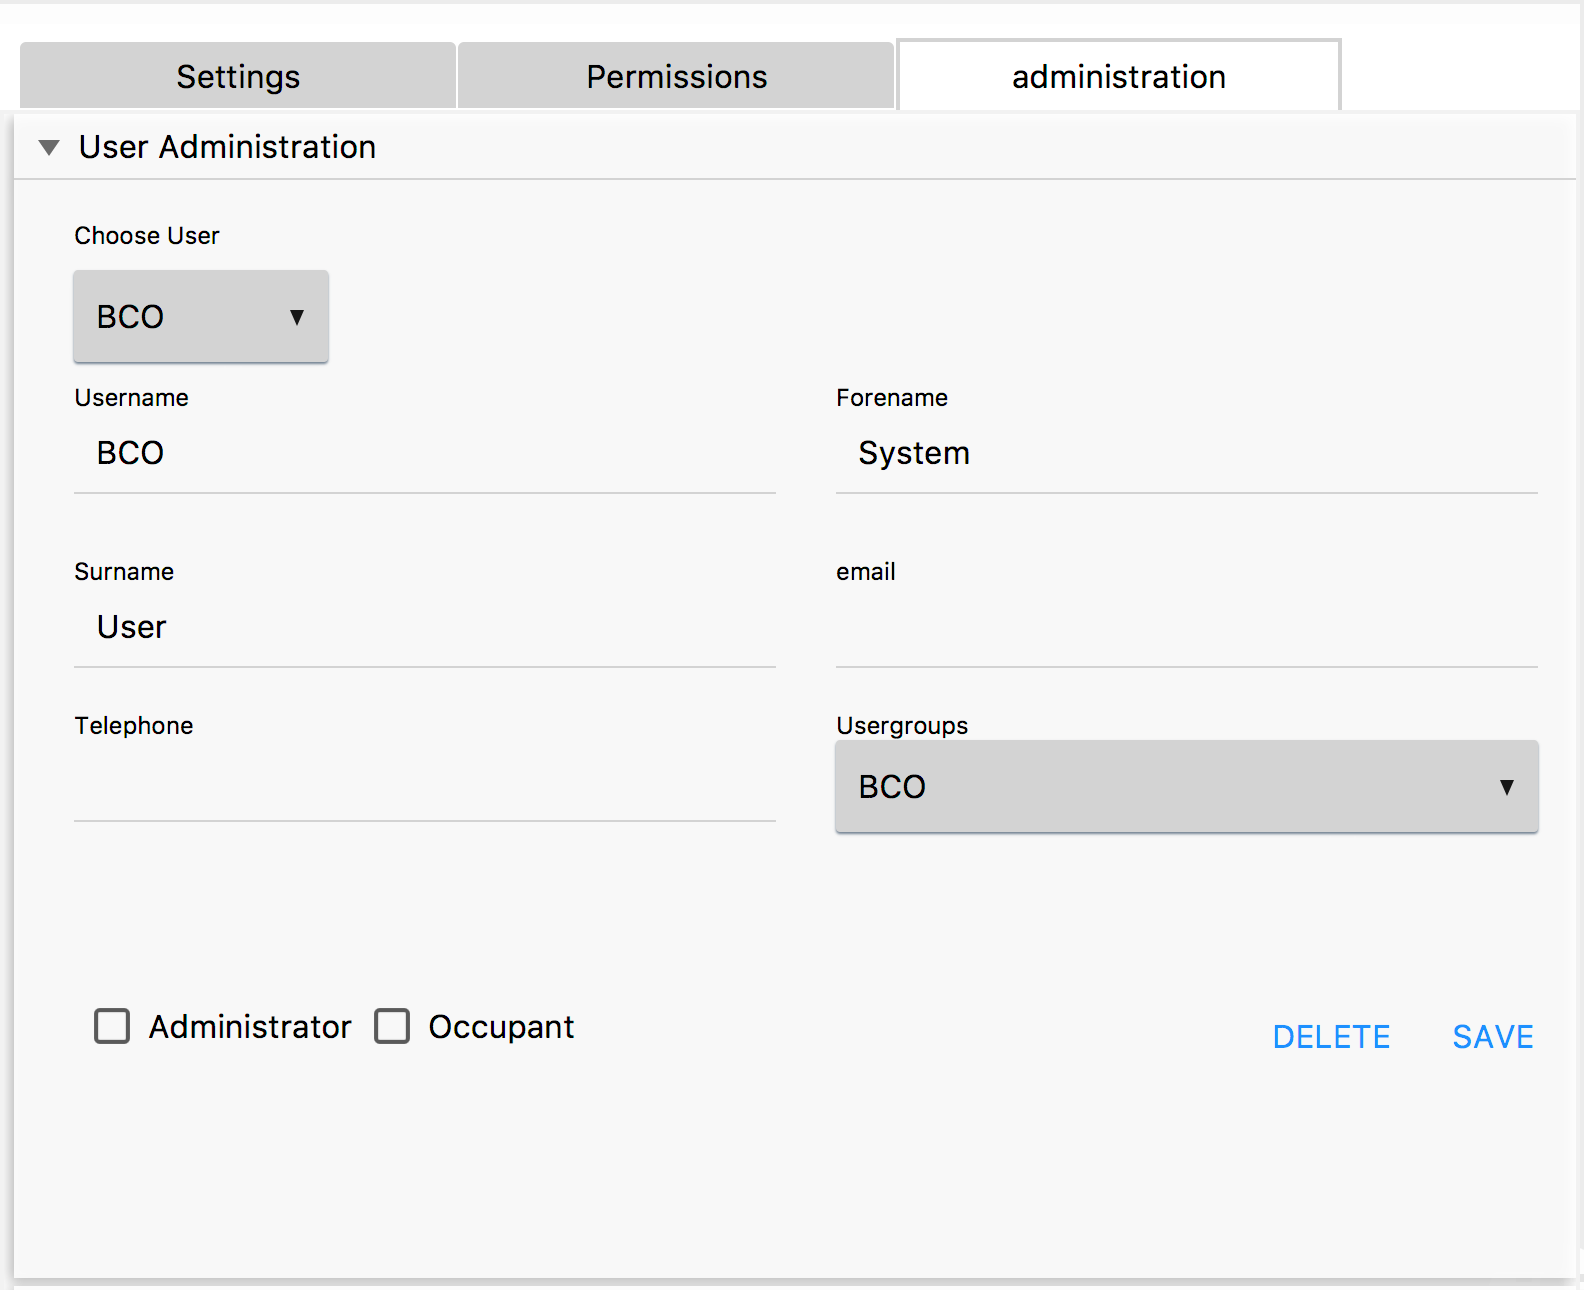
Choosing an existing user in this dropdown will display all his available data. You can simply modify them and hit the save button to finish. To delete a user, choose the delete user button. You will be prompted to verify that you really want to remove the user. If you are sure click ok. This cannot be undone!
How to Manage Authorization Groups
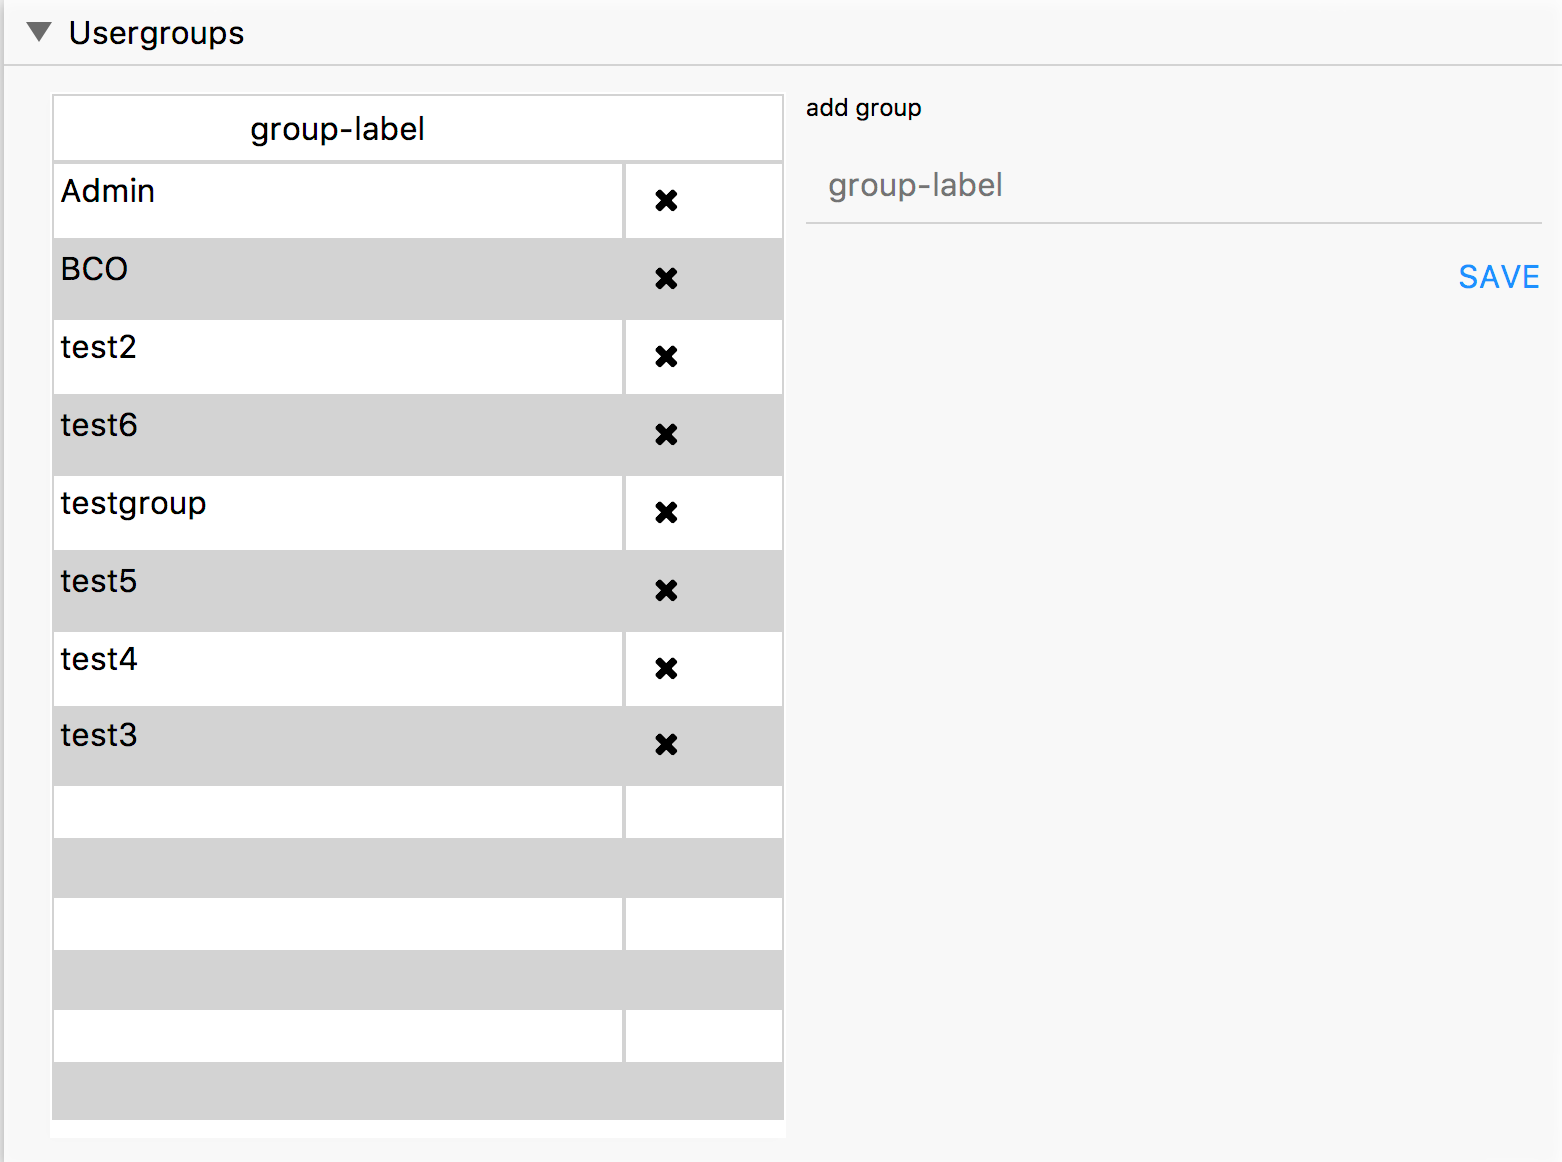
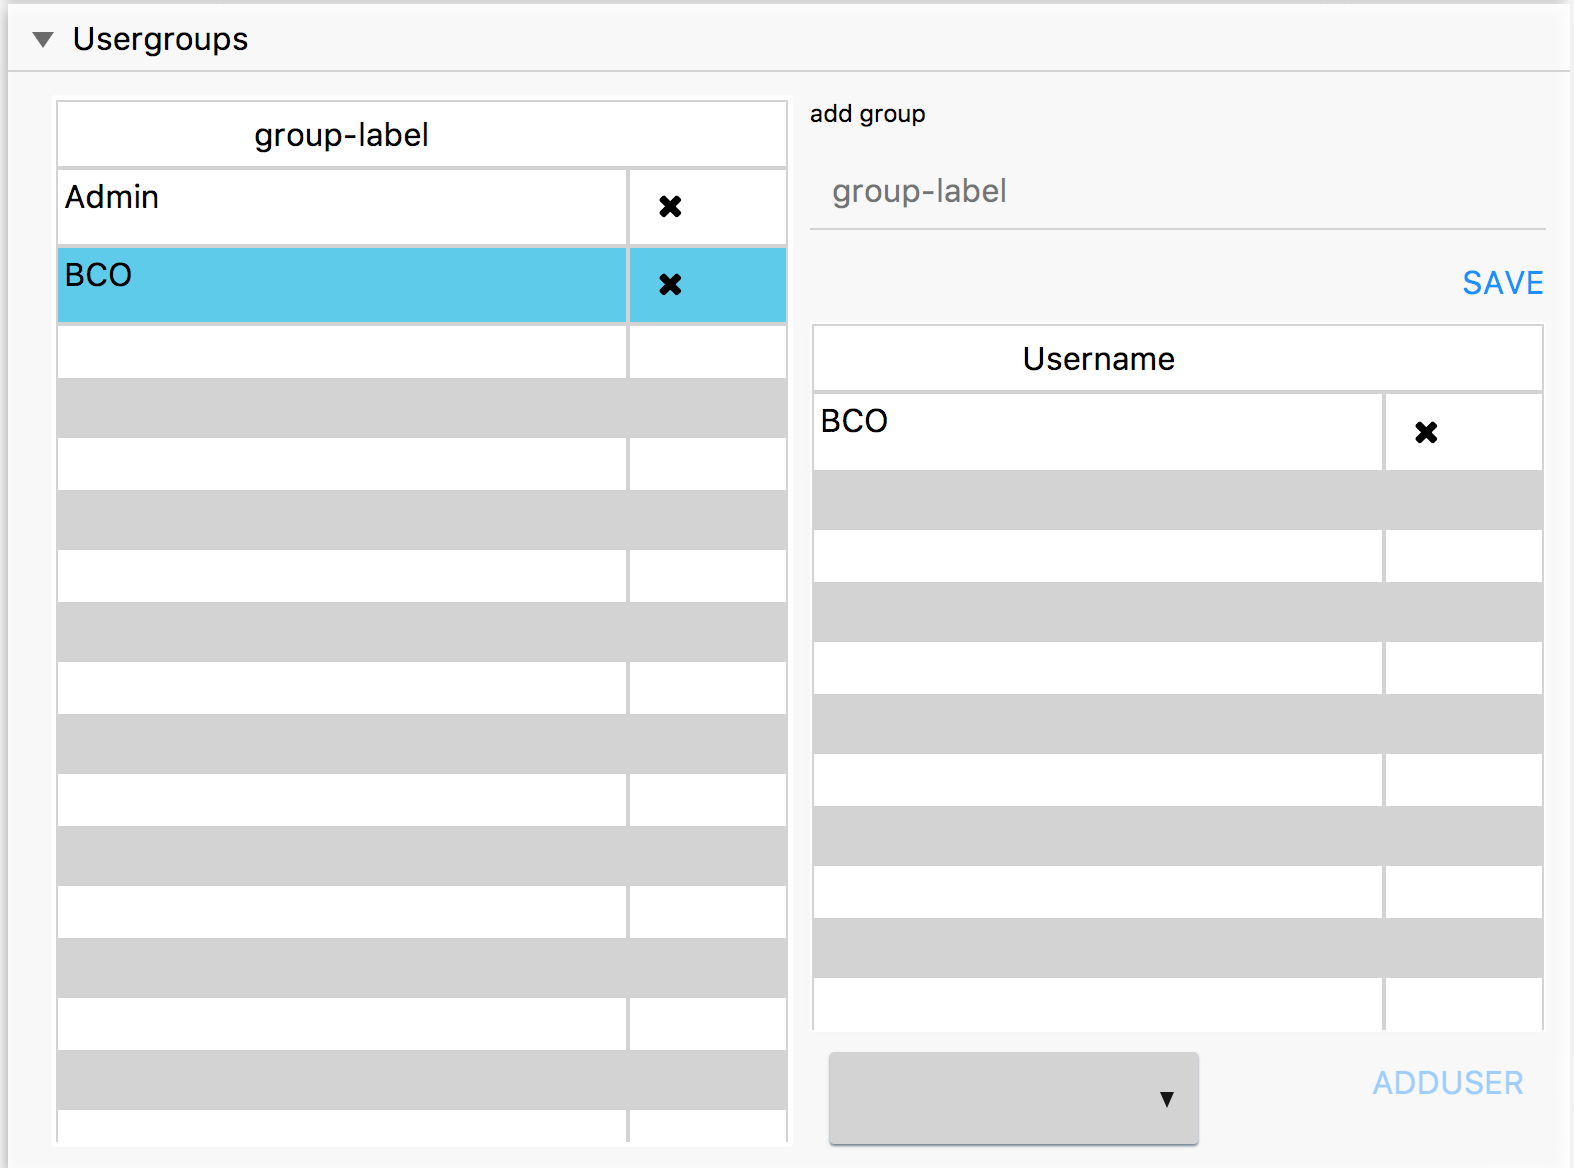
If you would like to add or remove a authorization group or manage the users inside those, open the Administration tab. Now expand the Authorization Groups pane. You will find a list of all available authorization groups. Selecting a certain group inside this table will open a list of users inside this group. A user can be removed from a group by clicking the little remove icon beside the corresponding username. To add a new user to a group, select its username in the dropdown and click the Add User button. Groups can be deleted the same way as users - simply click the remove icon beside the group to be deleted. Adding a new authorization group can be achieved by entering the desired name and clicking the Save button. The name must not be identical to an already existing authorization group.
Unit Menu
To interact with the smart home system, the right menu should be used. In this menu all currently available BCO units can be found to get information about the current state or to manipulate the smart home. In the following an explanation is given on how to interact with the units and which information the units provide.
Interaction with BCO Units
The current selection of units is based on the marked location. If non location is marked all available units are provided by the unit control menu. The units itself are grouped by types like battery or colorable light. A single click extends a list of all units of the same type. To de-/activate a selected unit, a single further click at the unit should be done. Some units like pure sensor units do not provide control abilities but deliver information about environmental states or measurements. In this case they have passive information only and no direct interaction possibility, examples can be motion, battery, etc. A double click expands/unrolls the individual unit menu, assumed there is additional information provided. In the expanded mode the unit offers two interaction panes (passive/active), which are explained in the following.
Main Function Pane
The main function pane (upside) of each unit provides the most important unit information and interaction. In a short outlook an associated icon, the unit name and a current state overview are given. If the unit provides control abilities (e.g. lamp), the state can be manipulated via the displayed interface (e.g. switch button). In the case of connection problems or similar, the states of the units can't be displayed and are shown as interrogation points.
Sub Pane
The sub pane (underside) of the unit provides secondary information and/or control elements. At this juncture only some units have secondary function or rather a sub pane. So, don't worry, if a unit can't be expanded. Units with optional interaction are e.g. colorable light and temperature controller. They allow the color manipulation and the adjustment of the current temperature.
Info Bar
The info bar at the bottom of the GUI is providing further information of objects that the user is pointing at. For example the name of a room or an area is shown if you hover above it.